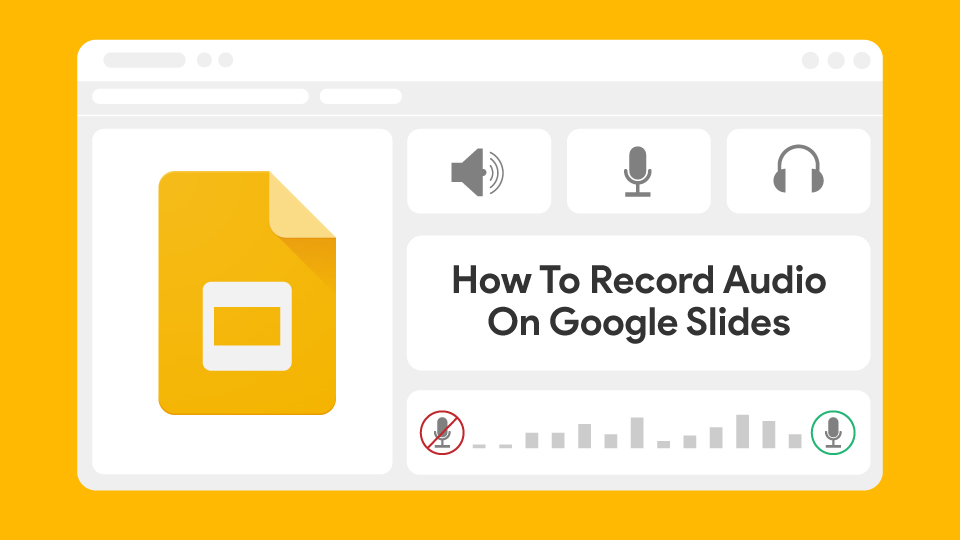
Did you know incorporating multimedia elements can significantly enhance engagement while creating dynamic presentations?
Audio takes the spotlight for its knack for boosting understanding, setting impactful vibes, and generally keeping the viewers engaged. Learning how to add audio to Google Slides can be pretty nifty, especially if you are a presenter.
Mastering this skill will elevate the impact of your presentations and captivate your audience. So, dive into this step-by-step guide on how to insert audio into Google Slides with a few clicks.

Why Adding Audio to Google Slides Enhances Your Presentation
The saying “a picture is worth a thousand words” holds even when hosting presentations. Integrating relevant sound elements into your Google Slides opens up a world of possibilities. Here are several reasons why incorporating audio can be beneficial:
- Grabs Attention: Audio engages from the start.
- Elicits Emotion: Sets mood and tone.
- Clarifies Complexities: Aids understanding.
- Suits Different Learners: Appeals to various senses.
- Highlights Key Points: Emphasizes important content.
- Smooth Transitions: Enhances flow between slides.
- Crosses Language Barriers: Benefits global audiences.
- Boosts Interactivity: Supports quizzes and interviews.
- Compelling Storytelling: Narration + visuals leave an impact.
- Adds Personal Touch: Builds presenter-audience connection.
These are all the benefits of adding audio or music to your presentation. However, exactly how to add music to Google Slides? Let us take you through an easy tutorial!
How to Insert Audio Into Google Slides: A Step-by-Step Guide
Learn how to insert audio into Google Slides by going through the steps illustrated below:-
Learn how to insert audio into Google Slides by going through the steps illustrated below:-
- Launch Google Slides
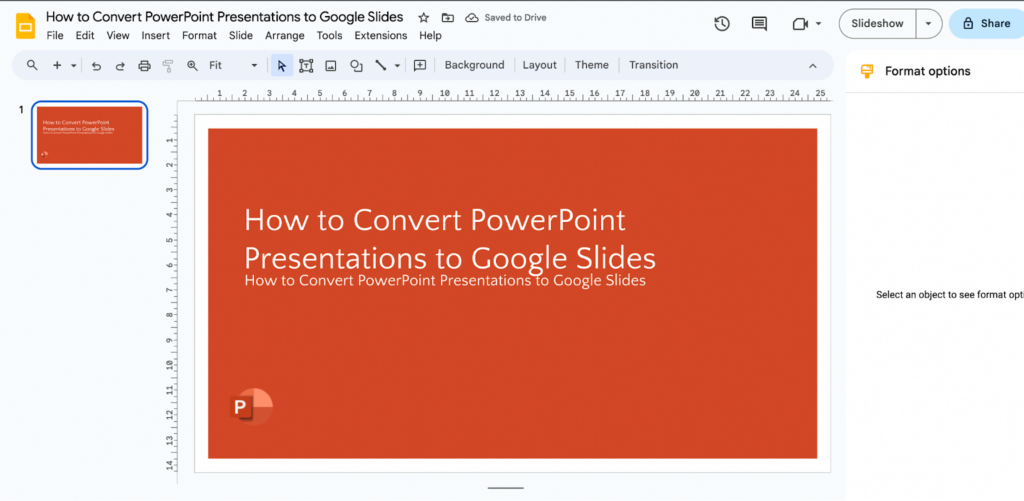
Log in to your Google account and access the Google Slides presentation where you want to incorporate audio.
- Choose the slide

Identify the slide within the slide pane on the left where you wish to embed the audio. Click the slide to select.
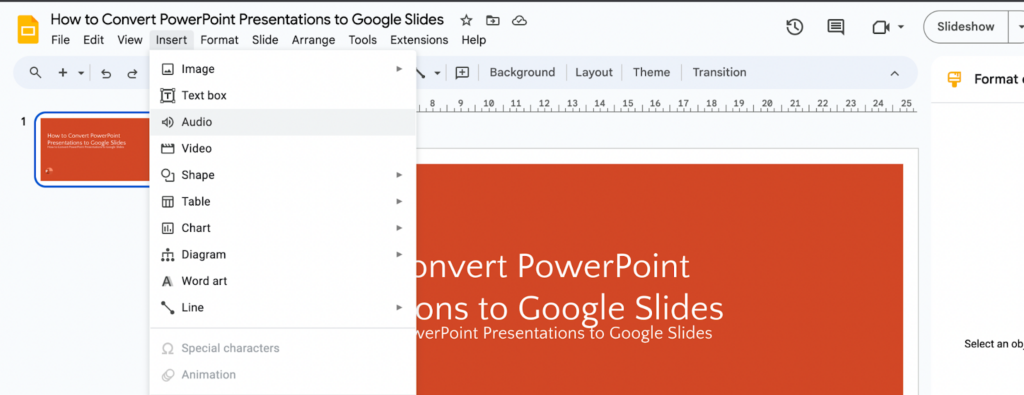
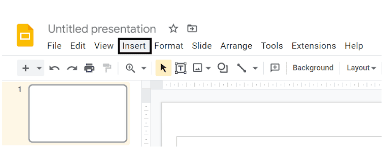
- Access the “Insert” option
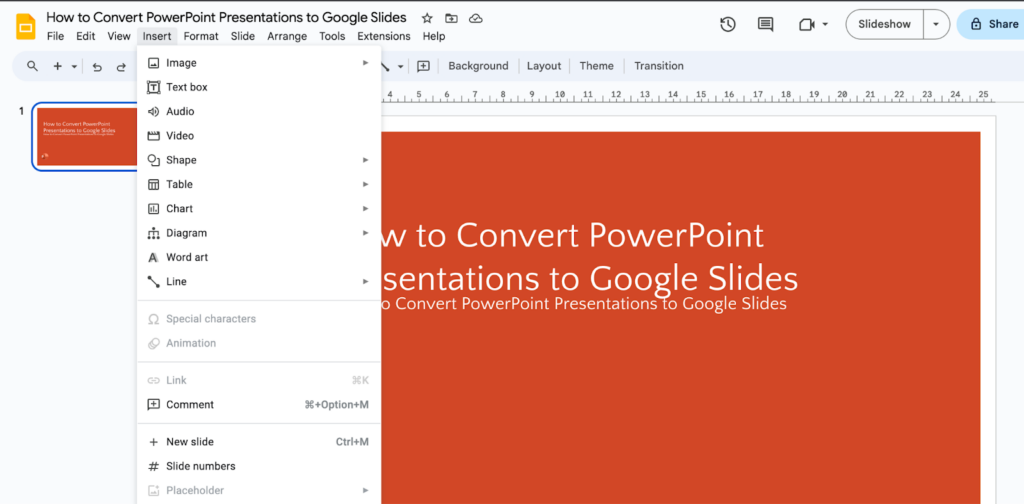
At the upper menu bar, locate and click “Insert.”
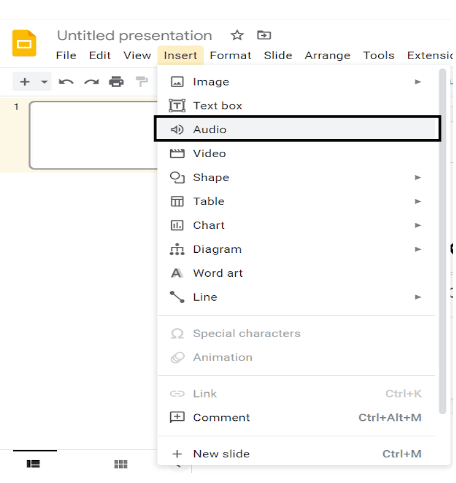
- Select “Audio”
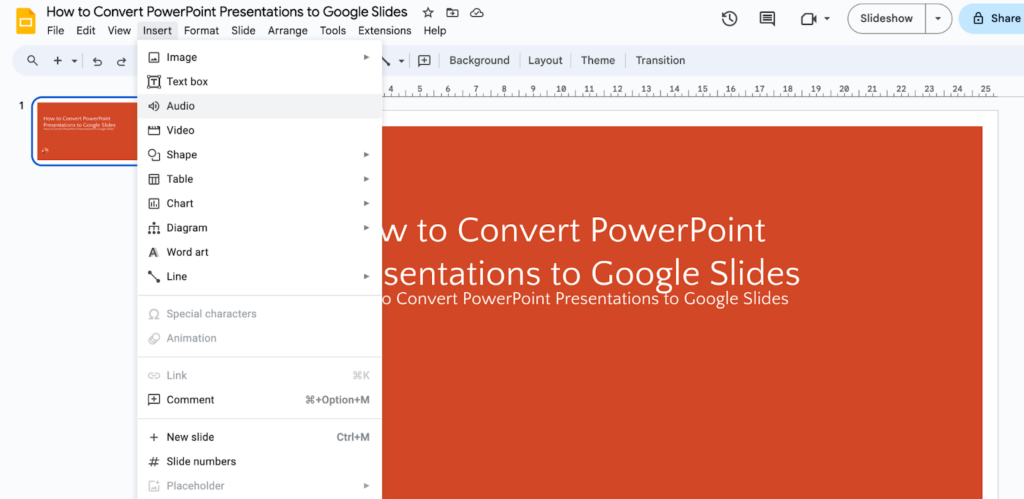
Opt for “Audio” from the dropdown menu.
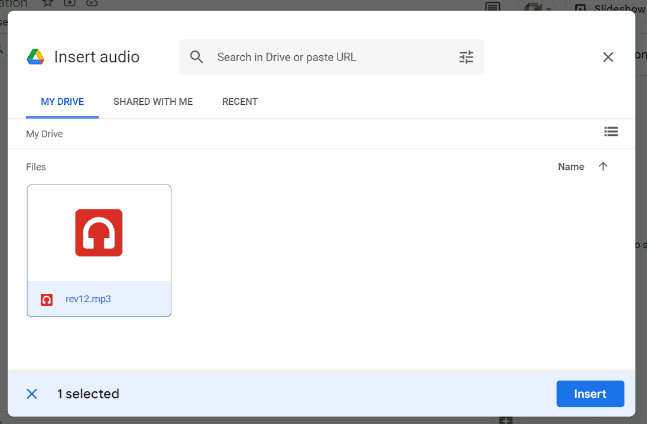
- Incorporate the audio
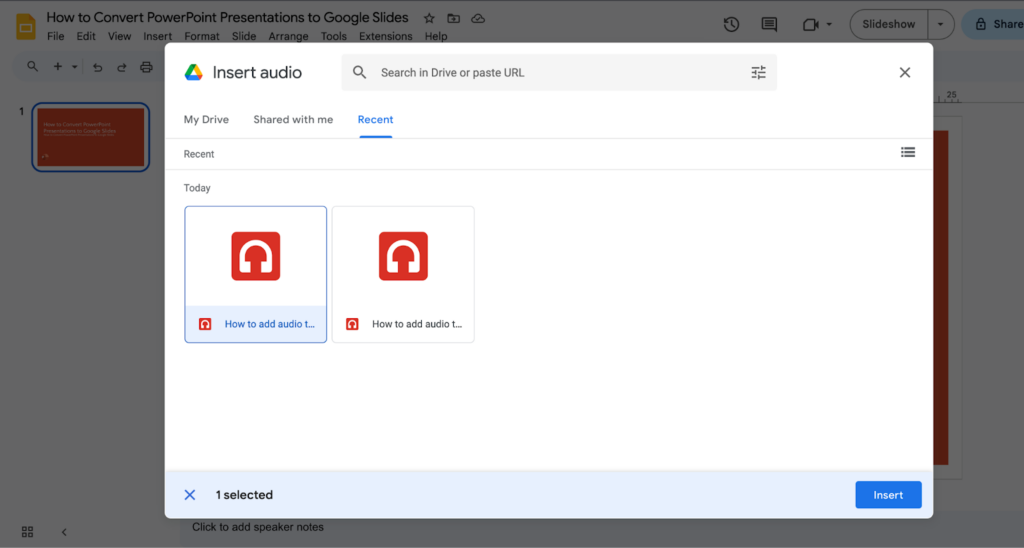
Select “Choose a file” from the right panel on your screen and upload your audio file.
- Initiate the uploading process
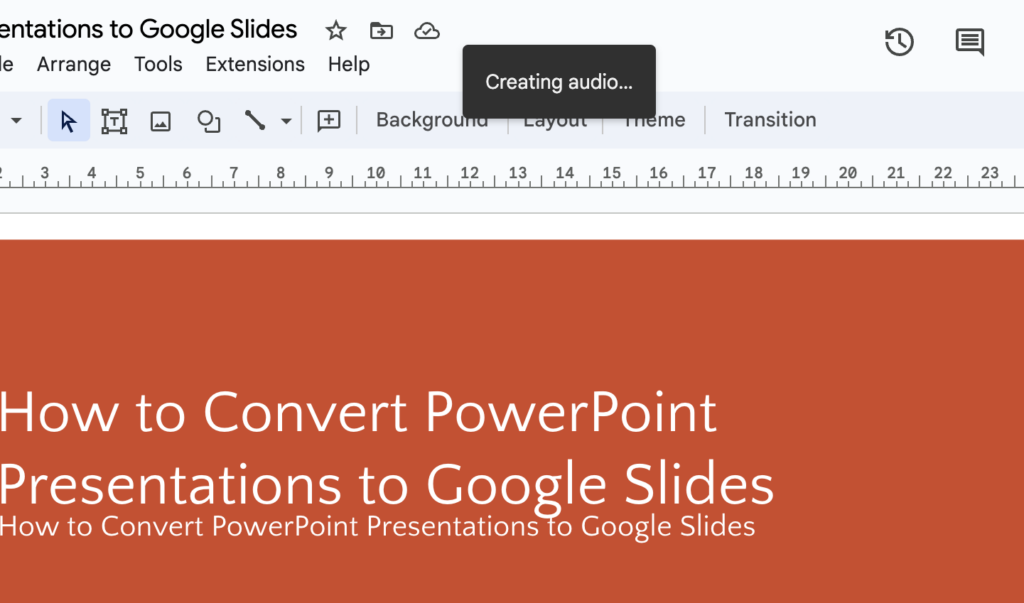
Select the desired file from your computer. Click “Open” to upload.
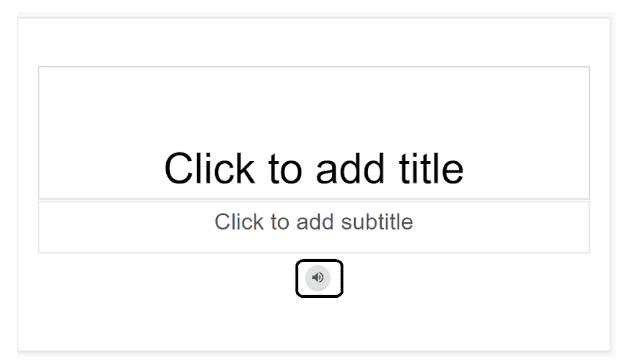
- Modify the audio icon position

An audio icon will appear on the slide once the upload is done. Feel free to click and drag the icon to place it where you want on the slide.
- Control audio playback
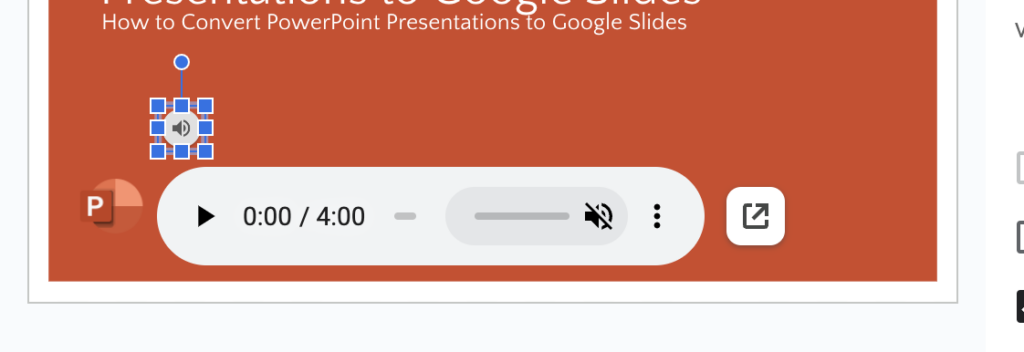
Give the audio icon a click. This will bring up a toolbar at the slide’s top, providing you with choices for audio playback. Give the audio icon a click. The “play” button is for hearing the audio preview, and the “mute” button can help deactivate the audio.
- Format options
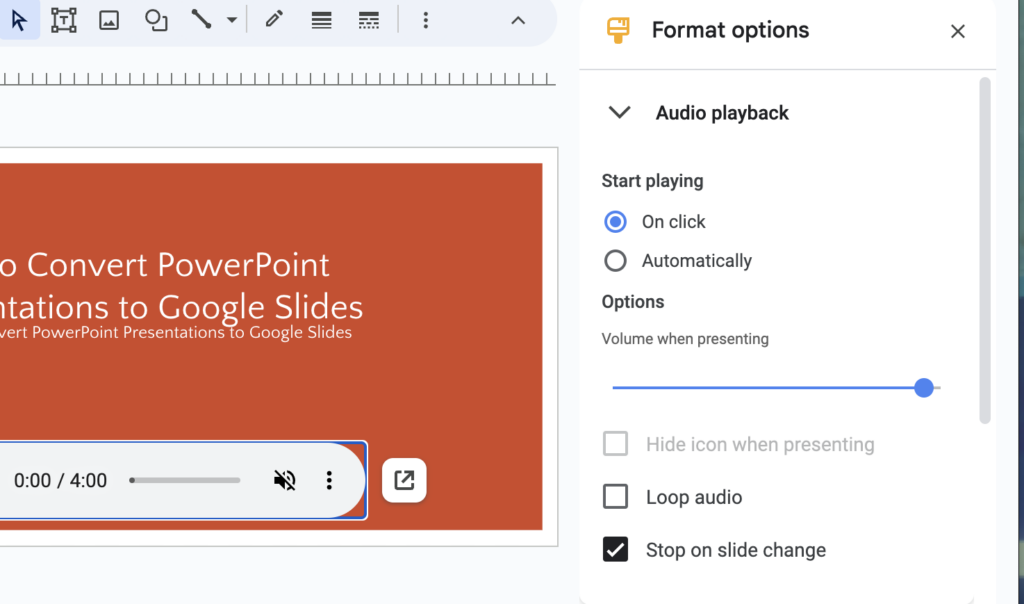
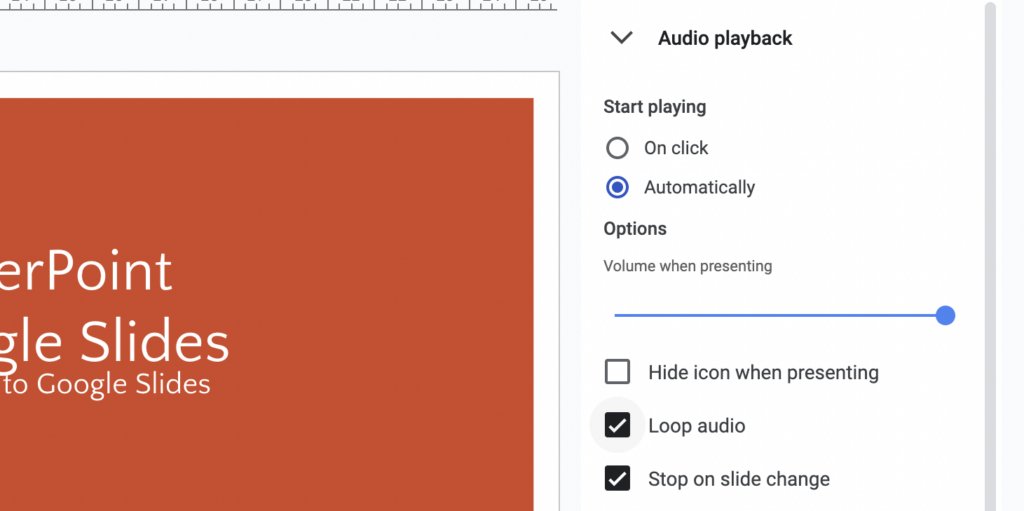
Click the format options button (three vertical dots) to access advanced audio settings. In the format options menu, you can:
- Autoplay: Choose whether the audio plays automatically when the slide is reached.
- Loop: Decide if the audio should loop continuously.
- Hide Icon: Opt to hide the audio icon on the slide.
- Set the Audio Timing: If you’d like the audio to kick in at a specific slide point, click the audio icon, then head up to the top and select the “Slide” menu. From there, pick “Audio” and tweak the starting time to your preference.
- Preview and save

Repeat this process for every other slide if your presentation requires it. Play through your presentation to ensure the audio works as intended. Once you’re satisfied, make sure to save your presentation.
Tutorial: How to Record and Insert Your Own Audio on Google Slides
Method 1: Upload recorded audio files
Wondering how to record audio on Google Slides and use it? Follow these easy stes to get started!
Step 1: Prepare Audio
Record your audio narration using a microphone or recording tool.
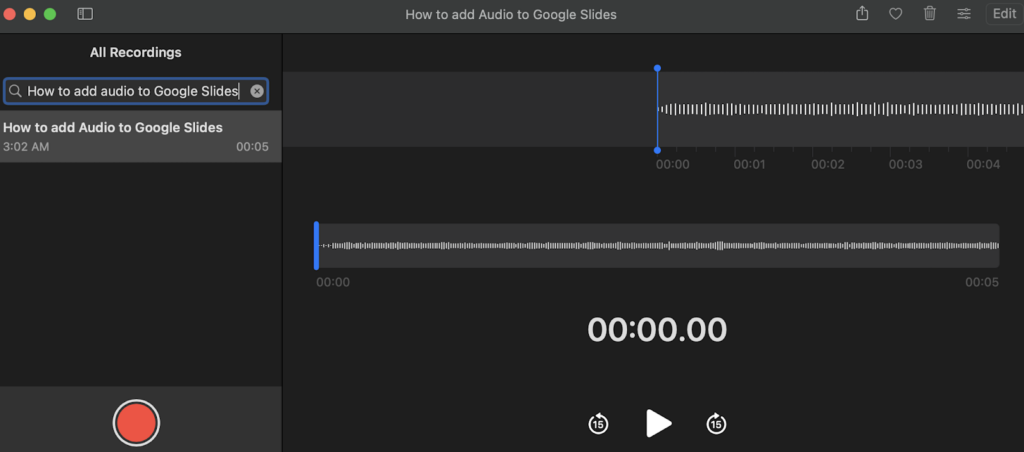
Step 2: Upload the audio to Drive
In the panel, click the “Record” tab and speak into the microphone. Click “Stop” when done. Listen to your recording and re-record if needed.
Step 3: Open Google Slides and select the desired slide
Log in and open your presentation. Choose the slide where you want to add audio.
Step 4: Insert Audio
Click “Insert” > “Audio.” and choose the audio file you had uploaded to your Google Drive before.
Step 5: Autoplay, Loop and Adjust Timing
Check “Autoplay” for automatic playback and choose to loop if desired. Click the audio icon, “Slide” > “Audio” to set the start time.
Step 6: Save and Present:

Save your presentation. During the presentation, your audio will play based on settings.
Method 2: Adding audio through Online Voice Recording Websites
Adding audio to online voice recording websites enhances presentations by incorporating personalized narration, explanations, or sound effects. Here’s how to record and save the file through Rev Online Voice Recorder.
1: Open the website of Rev Online Voice Recorder. Click on the Record button.
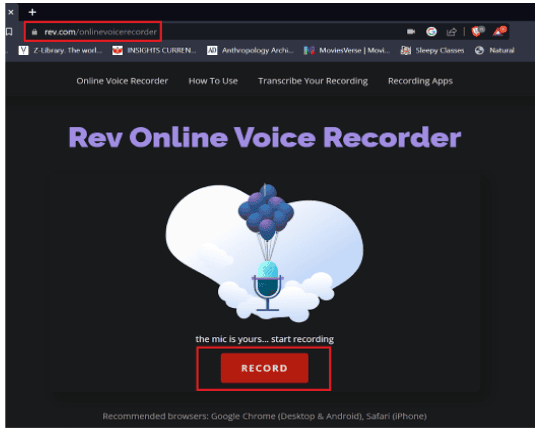
2: Accept the permissions asked by the website.
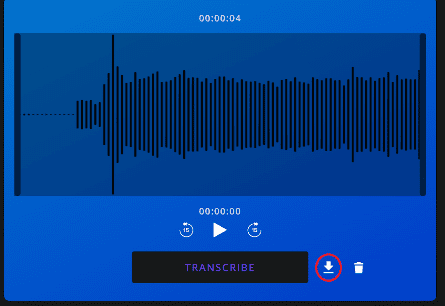
3: Click on the Download button and your audio file is saved.
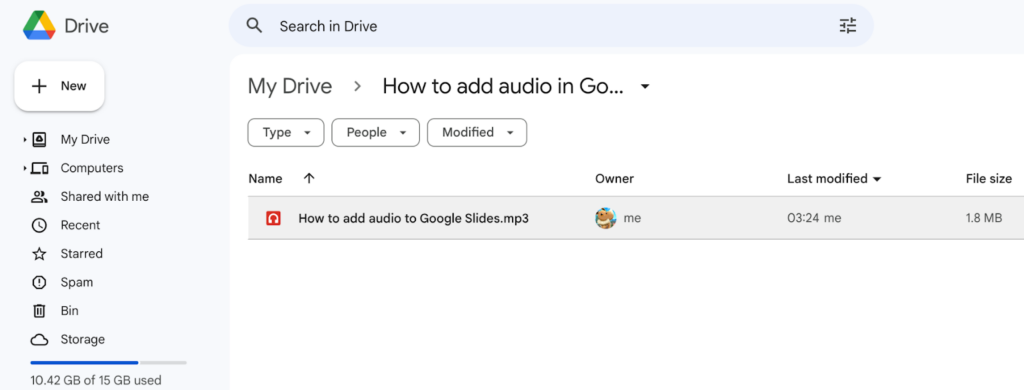
4: Open ‘Google Drive’ to save your audio file in Google Drive.
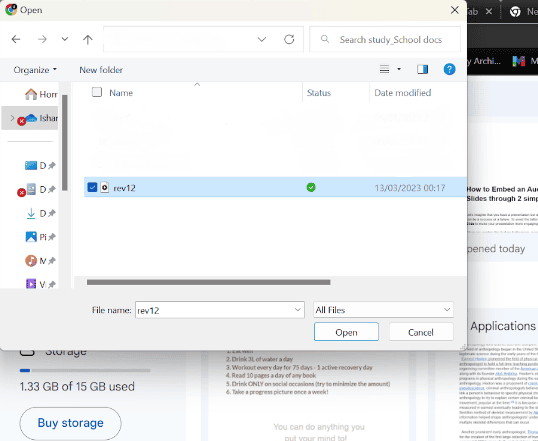
A. Click on ‘File upload’ and a Dropbox from ‘Your Files’ will appear.
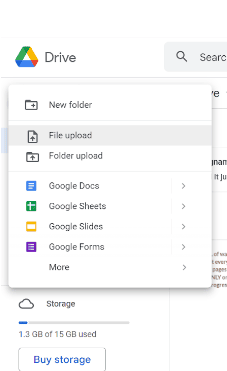
B. Select the audio file you recorded to insert in your Google Slides and click on ‘Open’.
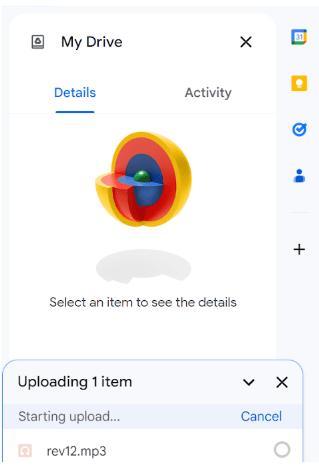
C. Audio is uploaded in progress, visible in the bottom right corner.
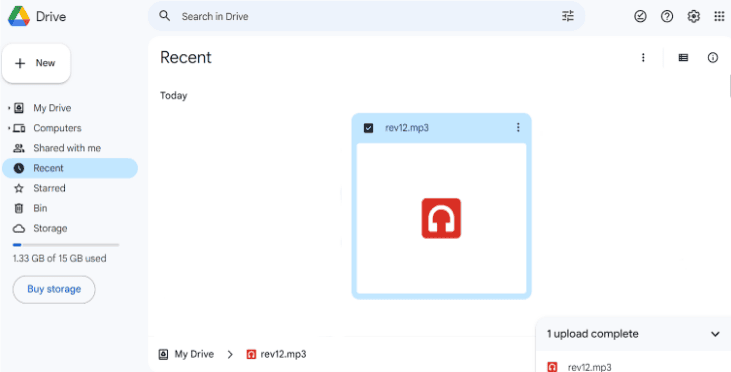
D. Click on ‘Recents’ and your recently uploaded audio file will be visible in your Google Drive.
Now that the audio file is uploaded on Google Drive you are ready to embed it in your Google Slide.
TIP: Share audio separately from Google Drive when sharing Google Slides with your team.
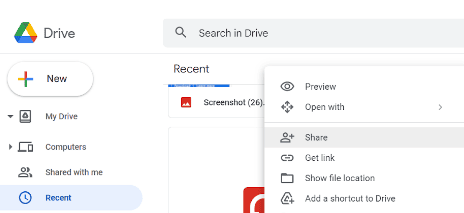
Right-click on the audio file and click on ‘Share’. Choose the option of ‘Anyone with Link’ for the Google Slides viewers to play it.
5: ‘Open’ your Google Slides presentation or create a new one.
TIP: Type in Slides.new to instantly create a new one!
6: Click on the ‘Insert’ dropbox.
7: Select the ‘Audio’ option and then choose the file you have uploaded on Google Drive.
After you select your desired audio file, click on the ‘Insert’ option to embed the audio file in your Google Slides.
After you embed the audio file in your Google Slide a ‘speaker-like icon’ will appear on your screen. You can drag it anywhere on your slide and it really helps to check if your audio is playable or not.
8: On the day of your presentation, make sure that you are logged in to both versions of Spotify (Desktop and Web Player).
You will be required to click on the link and it will redirect to the song, album, or playlist you have embedded through Spotify.
How to Play Audio During The Slideshow

To play audio during a slideshow, follow these steps:
Step 1: Insert audio

Use the software’s “Insert” or “Audio” option.
Step 2: Select slide and upload

Choose where the audio should play. Add the audio file (e.g., MP3) to the slide.
Step 3: Adjust settings

Set autoplay, volume, and loop.
Step 4: Test playback and present
Check the audio during the slideshow run. During the relevant slide, audio will play.
Adding audio is a powerful tool for delivering information, setting a mood, and capturing your audience’s attention. Just how an addition as simple as an audio file can enhance your auditory experience, a powerful AI-driven tool like SlidesAI can take the visual game to the next level!
SlidesAI is a text-to-slide tool that enables users to create impressive presentations that compel the audience’s attention and help users present their best. With SlidesAI, you get to experience efficiency, customization abilities, automation, and ease like never before!
Reach out to us and get ready to amp up your presentation game with SlidesAI!
